How to get the API key
To use the Microsoft API you need an Azure account, where you will get the API key and the region in which you will use the translation system.
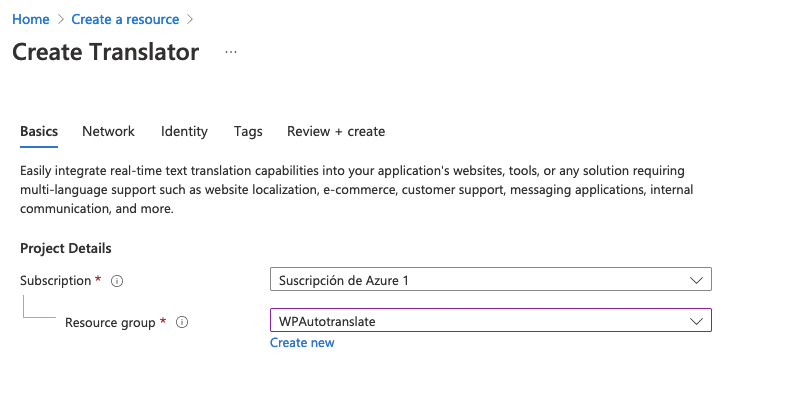
Then, the first thing we have to do is creating the instance for the translation system. In the resource group we create a new group and open it, for example, WPAutoTranslate.
In instance details we will choose Central France as region and as Name we can indicate the one we want, in this case we have called it WPAT.
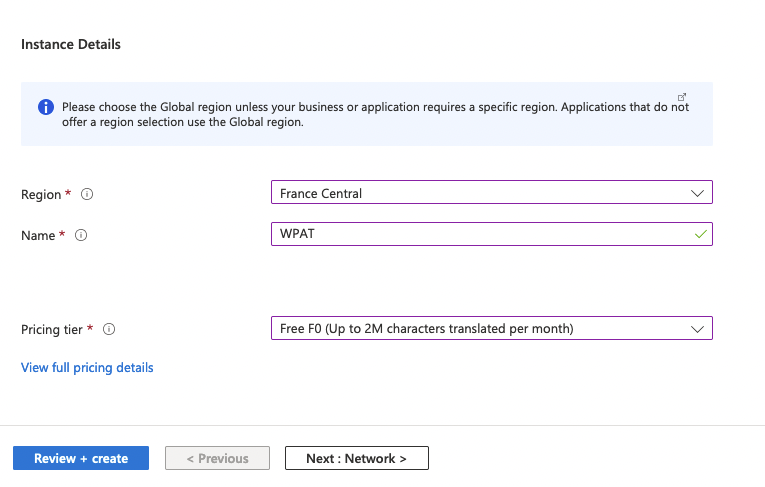
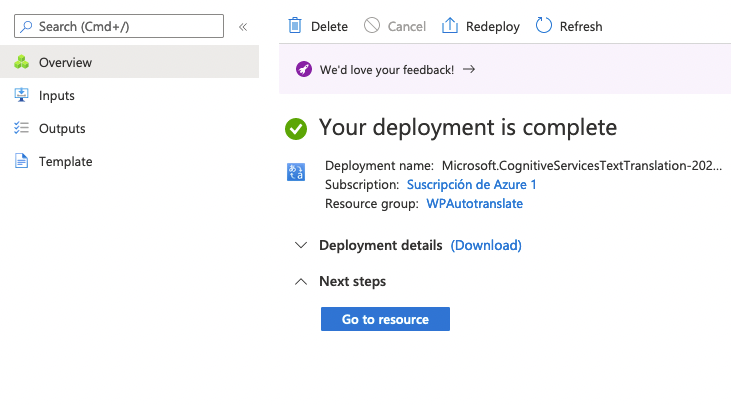
The service plan will be Free F0. Click review and create and in the next screen that appears we click on the button Go to resource:
Next, we go to Keys and endpoint. There, you should select any of the two keys offered to you, as well as the location.
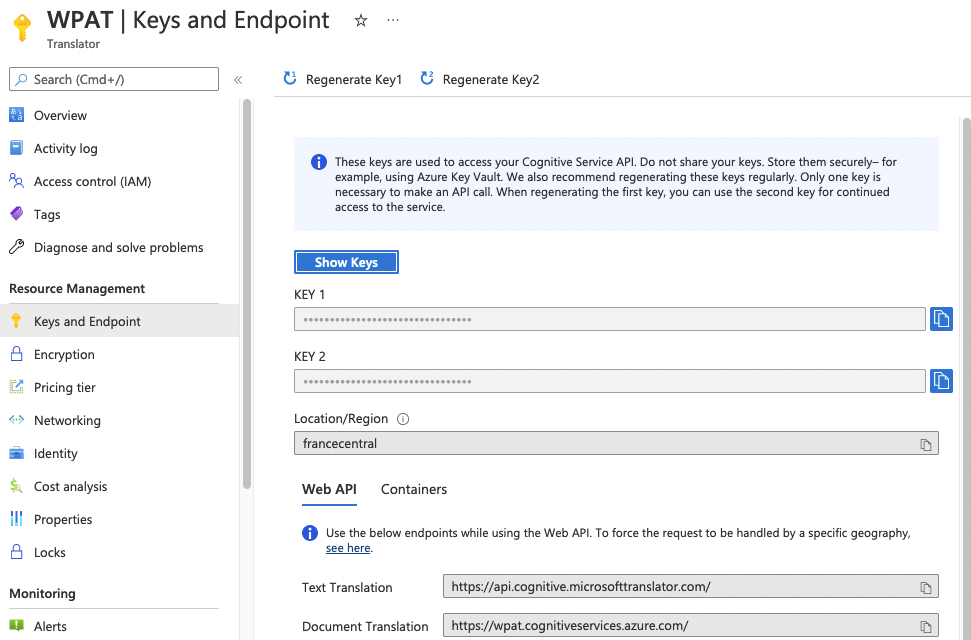
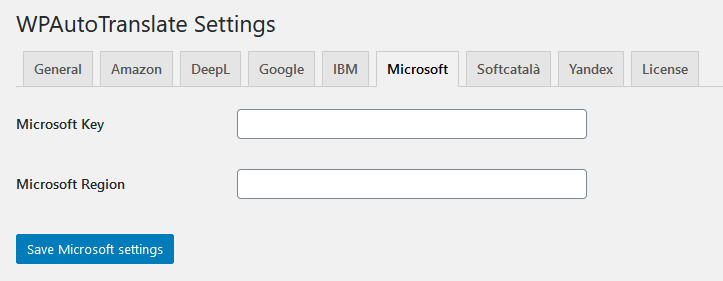
Use this data in the Microsoft tab within the plugin settings.
What happens at the end of the free period?
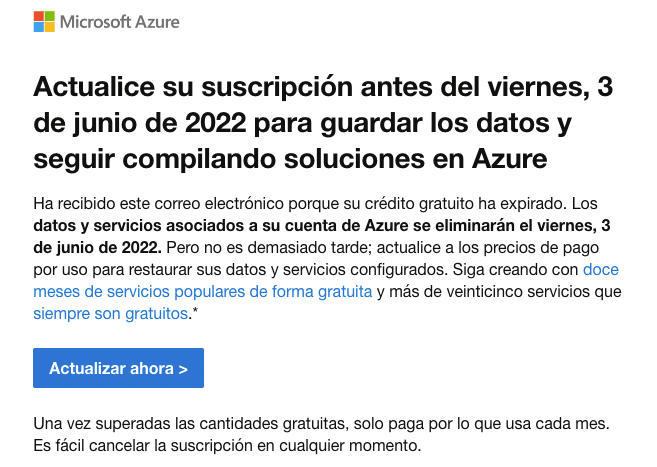
When we create a free Azure account, we have one month of free popular services and a USD200 credit. Within those free services are included 2 million translation strings per month. At the end of the 30 days or after you spend the credit (whatever occurs first), Azure will send you an email to switch to the pay-as-you-go rate.
When we switch to this rate it is important to know that we will continue to have 12 extra months of free popular services (within which are the 2 Million free chains / month). After the year, the pay-per-use rate will be implemented and it is necessary to pay each month depending on the chains we use. The cost will be charged with the payment method we have provided. Here you can find the price list according to the chains used. Our case corresponds to standard translation prices.
A question that you might have is why not directly creating our account with the pay-per-use fee, instead of the free one. The answer is that this is not so advantageous, because only by going from the free rate to the pay per use rate will they provide us with the extra 12 months of free popular services.
Let’s see, finally, how we have to proceed when we receive the email from Azure notifying us that we have to switch to the pay-as-you-go rate. First we press the Update now button that appears in the email:
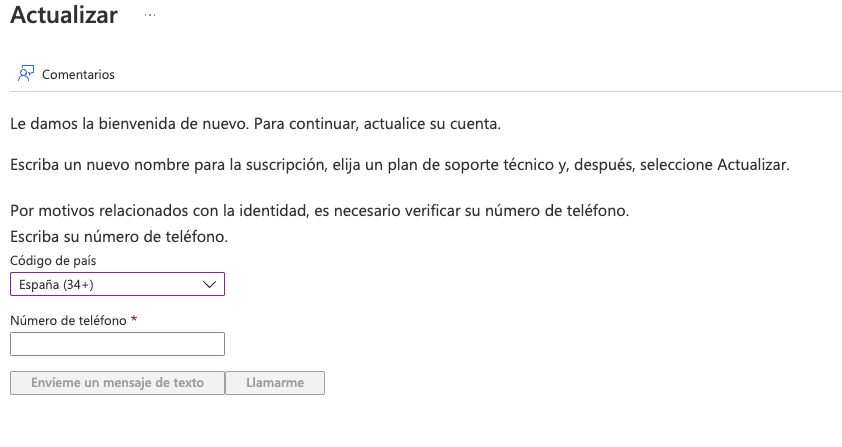
Then, a Microsoft Azure screen opens in which we will have to verify our phone number:
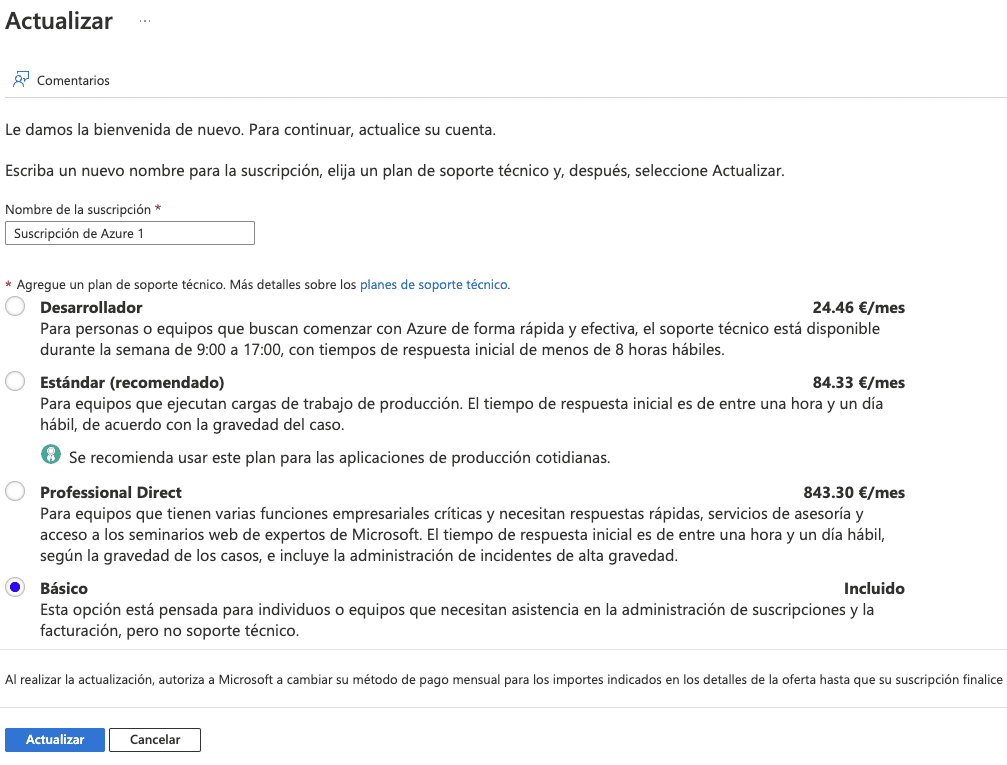
And then we choose the type of subscription, that will be Basic:
Once the type of subscription has been updated, we will be prompted to validate a bank card number to be associated with our account. For this, we will have to make the “payment” of 0 euros.
Once the payment method has been saved in Azure, our translation resource will work for another 12 months. The resource fee plan will be the same as we have used with the free account: Free F0.